Magical Mandalas by Sue Speck
Don’t let the intricacies of these exquisite mandala designs frighten you off! Perfect placement can be al-most guaranteed, thanks to a variety of workarounds, plus affordable, clever tools to help you achieve beautiful results stress-free. That’s a promise!
All the Glory
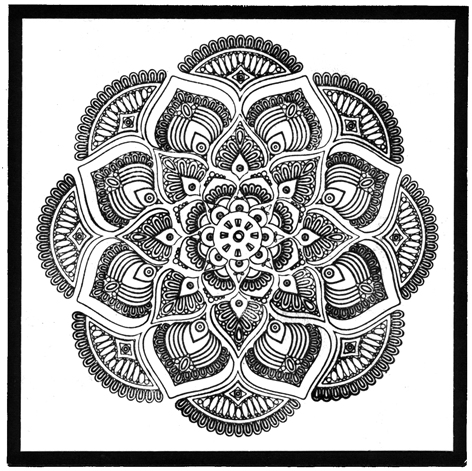
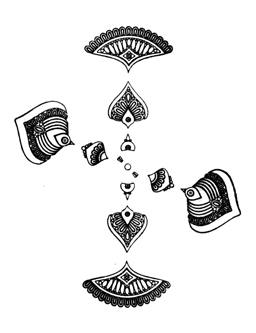
Sue stamped the image four times to create her black-and-white mandala. A stencil came in handy for proper image placement.
(Stamp and product credit: Mandala design, stencil—Nellie Snellin.)
There are so many images to place and even with a template that ensures perfect positioning, it still looks like a very time-consuming endeavor.
Enter artist and innovator Nellie Snellin, designer of numerous clever tools for rubber artists. Her idea was to include several images on one stamp, so a complete mandala can be stamped in four impressions, rather than eight, which is typical for most mandalas. (See Sue’s mandala and the Nellie Snellin stamp image.) You get all the glory with half the work!
Currently, Nellie Snellin.com has four mandala designs available. Available separately is the stencil template Precision Circle Stencil that makes perfect placement easy. Both items are affordably priced.
Several companies provide innovative tools to help stampers create their own beautiful mandalas. A stamp positioner and a plastic template to position cardstock precisely for accurate stamping are essential. Affordable templates in a range of sizes are available from Gina K.
Concord & 9th offers matching mandala stamp and die sets. Popping up individual layers with foam dots will add dimension to a mandala. A seven-minute video about these products can be viewed at https://www.youtube. com/ watch?v=tgOXLOnl_30.
Kat Scrappiness provides a die-sized mandala frame to go around their intricate mandala die. These are stunning when paired together, and also very beautiful when used separately.
Prickley Pear’s Circle Peek A Boo metal die is a complete mandala on its own. At 3.75 inches, with designs around the edge of the circle, there’s ample open space in the center to add a sentiment or other images.
Faerie Ring Mandala
(Stamp credits: Center mushroom—MountainsideCrafts; all others—Highlander Celtic Rubber Stamps.)
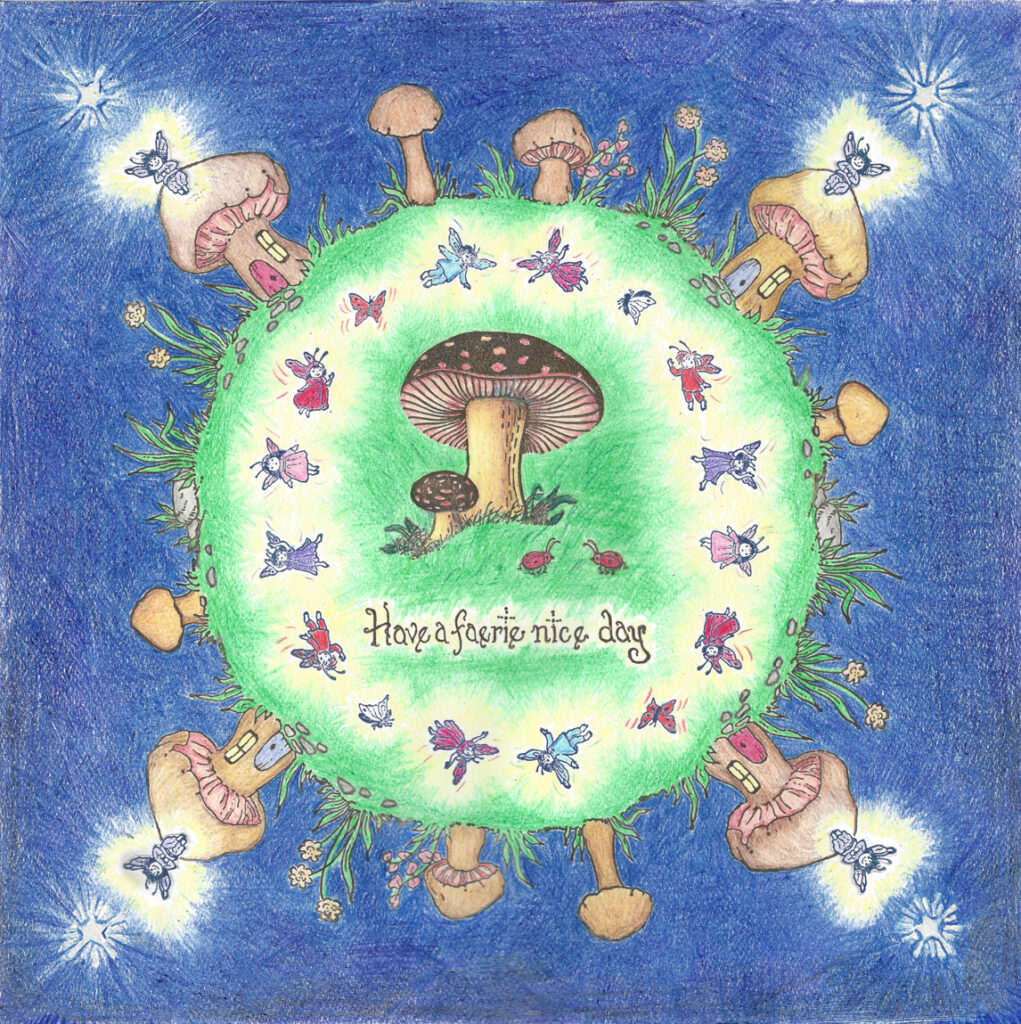
Artist Kim Victoria lives, stamps, and runs her very unique HighlanderCelticStamps.com business in Cedar City, Iowa. Her Faerie Ring Mandala is a delightfully creative take on the traditional mandala art form. She has made many mandalas before, including some really large ones. For this one, instead of using typical symmetrical design elements, her creation enchants us with faeries, mushroom houses, and shining stars beaming down from a beautiful night sky.
Except for the central mushroom, friend and fellow artist Amaji Fox designed all of the stamps for this piece. Kim loves the old-fashioned and gentle feeling Amaji’s art conveys and she obviously had an enjoyable time incorporating them into her mandala.
Kim began by sketching her ideas on a 12×12-inch piece of scrap paper. She drew very light pencil lines from corner to corner and across the center from midpoints marked on the four sides of a 12×12-inch piece of Bristol cardstock. She then used a compass to locate the outer and inner rings needed for image placement. All images were stamped and embossed in black except for the stars, which were embossed in white. The coloring was done with pencils, including the night sky, which Kim says used up most of her dark blue and violet pencils.
The four happy little fellows perched on the cottage roofs were stamped separately and fussy-cut out. “Faeries exude their own light, like a firefly, so that’s why they have light around them in my mandala,” Kim says. All the other images were stamped directly on the cardstock.
“There really are fairy ring mushrooms,” Kim says. “We had one on our lawn when I was a child. These small mushrooms are perennials and they project their spores outward from the center of the ring, so every year the ring gets larger. I’ve read that there’s an ancient fairy ring of mushrooms around Stonehenge, although human traffic may have affected it.”
According to Wikipedia, there’s a 700-year-old fairy ring in France and to date, no one has tried to harvest any of the mushrooms for what would certainly be a spectacular mushroom quiche.
Sea of Life
Stamp credits: Mermaid, fish, seaweed, coral, seahorses—Hero Arts; bubbles, school of fish—Avery Elle; dolphin, shells, starfish—Visible Image; saying—Stampendous.)
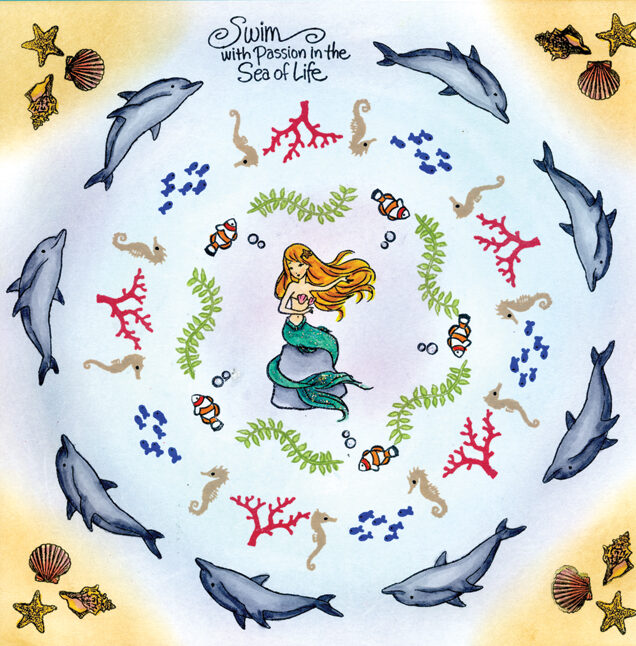
Artist Pat Walsh is a former, yet forever, Jersey Girl, who now lives in Peoria, Arizona. Her Sea of Life mandala is the result of a determined effort which is truly inspirational, especially as this is her first attempt at making a mandala!
Pat says she likes to work small and in reviewing her stash, found she has a sizable collection of mermaids, sea creatures and ocean sentiment stamps, which were just the right size for her mandala.
Her process began by reading RubberStampMadness articles about mandalas and learning how to get started with the circular patterns. After methodically collecting a variety of stamps she thought would work, the end result was, as she put it, “A mess! Too overcrowded, too many colors, realistic stamps didn’t work with the cute ones—and way too busy.”
Pat took a week to calm down, then returned to the fray. With fewer images, a smaller mermaid, and the addition of corner images, her ocean-themed composition took shape.
Pat has been captivated by mermaids since she was a child—The Little Mermaid by Hans Christian Andersen was one of her favorite fairy tales. After forty-nine years of numerous trips to the New Jersey shore, Pat laments the complete lack of any mermaid sightings. But that hasn’t stopped her from collecting them in rubber form.
After choosing this Hero Arts mermaid for the centerpiece, other sea-themed images were collected and stamped. The dolphins were colored with Copic Cool Grays and the eyes were dotted with an ultra-fine black Sharpie marker.
In a novel touch, shell groupings were placed in the corners and colored with a tan shade of Inkadinkado Blending Chalk. Subtle chalk blending with violet and blue was also done in concentric circles around the mermaid and dolphins.
Happy Day Mandala
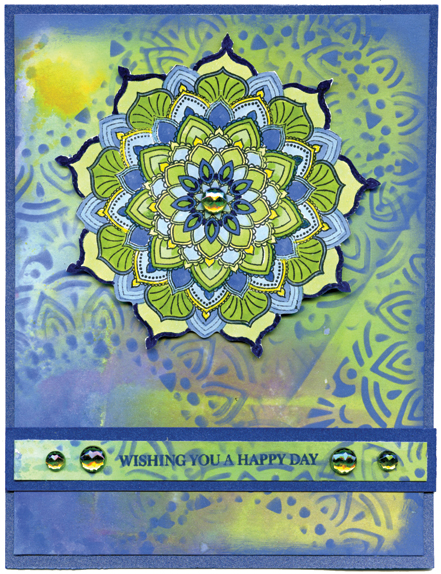
(Stamp and product credits: Many Mandalas set—Concord & 9th; sayings—Papertrey, Raspberry Suite; mandala die—Kat Scrappiness; coloring tools—Radiant Rain Shimmering Mist, Distress Oxide inks, Zig watercolor pens, Gina K inks.)
Happy Day Mandala is a wonderful study in moods, from the mystical soft background to the crisp and beautifully layered focal point.
For artist Lynette Etzel, who lives and stamps in Marion, Iowa, inspiration often comes from the internet. “I love to go on Pinterest and look for artwork that inspires me, and then I try to do my own version of what I saw.”
For this piece, Lynette worked with an innovative mandala die from Kat Scrappiness to create her mystical background.
After placing the die on cardstock, she sprayed Distress and Oxide inks through openings in the die. Any areas that were too heavily saturated with ink were blotted with a paper towel. TIP: You can fashion a temporary stencil by sending glossy paper through a die-cut machine holding the mandala die. The glossy finish stands up fairly well to wet inks and might even be reusable.
The stamped mandala in the center of Lynette’s card is an innovative set of layered images and matching dies from Concord & 9th. Obviously skilled with scissors, Lynette chose to fussy cut her layers and popped the middle one up with foam tape for added dimension.
The primary colors she chose were blues and teals, but Lynette wanted more contrasting color, so she added
a bit of yellow and several rhinestones to liven things up.
Springtime Serenity
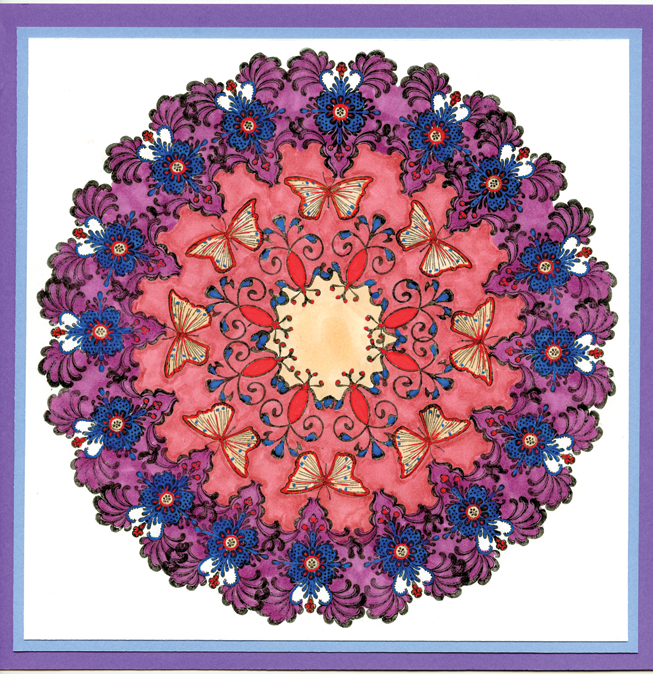
(Stamp credits: Interior flourish, exterior flourish—Inkadinkado; butterfly—unknown.)
Frequent contributor Aimee Eliason has given us a delightful homage to Spring with her colorful Springtime Serenity mandala.
From her home in Overijse, Belgium, Aimee created her mandala with a very cleverly designed tool from Inkadinkado called Stamping Gear. She says it’s “crazy easy” to get evenly spaced images with this tool. Available from Amazon, there are several shapes, along with a range of images designed specifically to work with Stamping Gear.
Aimee writes, “I ordered the Deluxe Set which comes with round and oval plastic tools and 16 clear flourish stamps. It’s simple to use and provides endless design options. The result is a unique ‘wreath.’ It does require a bit
of experimenting—but that’s all part of the fun.
“After you create mandala rings, you might see a little extra space to fit in a small image. I’d recommend adding fill-in images by hand because Stamping Gear works best with the specific flourish stamps that come with the kit.”
The larger areas of Aimee’s mandala were colored with alcohol markers and the tiny spaces were filled in with a Sakura brand gel pen. She recently purchased Sakura’s set of Moonlight 0.5mm gel pens and considers herself “totally hooked” on them. “I think every stamper should own a set of these.”
These pens have fine tips and provide opaque coverage. For example, the blue and orange details in Aimee’s mandala were colored with Sakura pens.
Sue Speck lives, stamps, and gardens in New Jersey. Visit her no-frills blog at aCardsmith.blogspot.com.


